
Create an intersecting conflict (no map)
A car and a cyclist can follow perfectly reasonable paths and still reach the same place at the wrong time. In this example you create that conflict from scratch, then turn it into a controlled two-second gap. No map is needed.
Learning outcomes: After this example, you can create and refine actor trajectories, change actor types, edit waypoint timing in both propagation directions, inspect an intersecting scenario, and choose suitable export formats.
Before you start: Trajectory mode
The initial window is already in Trajectory mode: selecting an empty position on the central canvas adds a trajectory point for the selected actor. Use either a pointer or the canvas keyboard cursor and Enter. The Switch to map mode button above the canvas confirms that trajectory editing is currently active. You do not need a map for this example. To learn the Map mode and create a small road network first, follow Build a simple map and drive it.
Optional shortcut: Open Load scenario in the header, select Pass straight intersecting vehicle from right passing straight (.json), and choose Load default to inspect a completed starting point. Choose Upload scenario in the same dialog for a scenario file from your computer. Continue below without loading the default when you want to build every trajectory yourself.
1. Create a clean intersecting scenario
- In the Actors list on the left, select
vehicle_1. You can rename it tocarin the Actor inspector below the list to make the example easier to follow. - Decide how you want to adapt its initial trajectory:
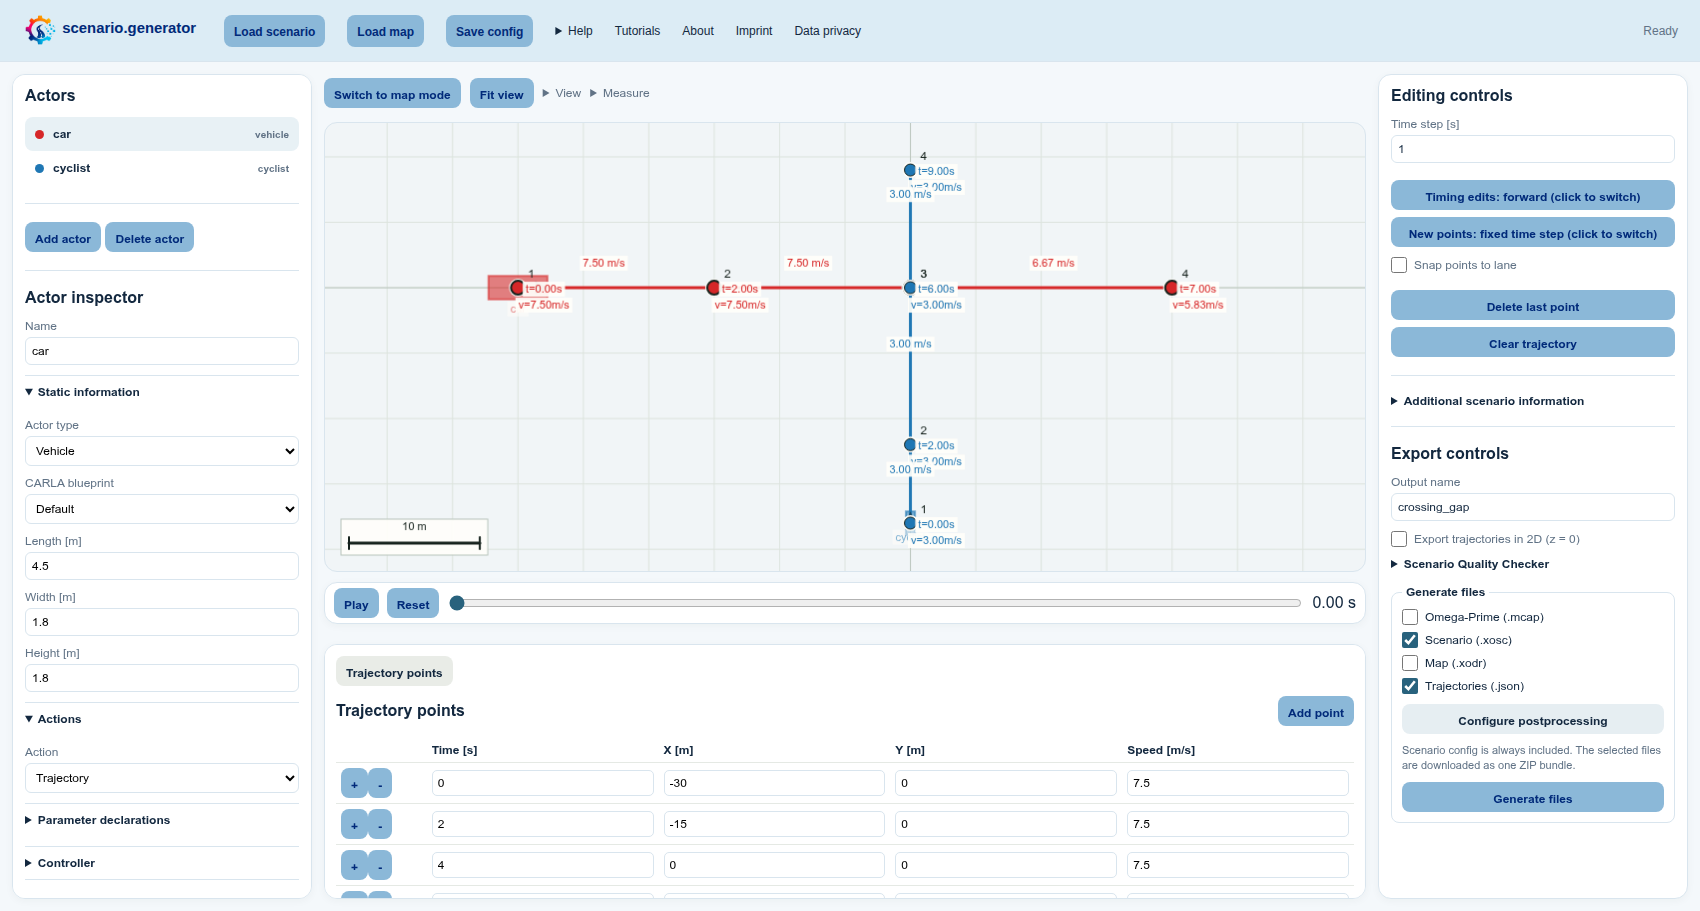
- To start from scratch, select Clear trajectory under Editing controls on the right and select several positions from one side of the central canvas to the other. Use either a pointer or the canvas keyboard cursor and Enter.
- To reuse the existing trajectory, drag its points to suitable positions on the canvas, or enter exact coordinates in the Trajectory points table below the canvas.
- Make the vehicle's path pass through the location where both actors should intersect. This can be any waypoint along the trajectory; it does not have to be the third point or the centre of the canvas.
- In the Actors list on the left, select
vehicle_2. You can rename it tocyclistin the Actor inspector. In Actor inspector → Static information, change Actor type to Cyclist. - Create or adapt the cyclist trajectory in the same way: use Clear trajectory on the right and select a new path with a pointer or the canvas keyboard cursor and Enter. You can instead move the existing points or edit coordinates in the table below the canvas. Make this path cross the vehicle path at the chosen intersecting location.
- Select Fit view above the canvas. Open View beside it and keep point indices, waypoint times, speeds, actor names, and bounding boxes visible.
2. Give the car priority
- Under Editing controls on the right, leave Timing edits: forward active.
- At the intersecting point, enter
4.0by double-clicking the car's canvas time label or by editing Time [s] in the Trajectory points table. Later car points move in time; earlier ones remain fixed. - Select the cyclist in the Actors list on the left. Under Editing controls on the right, switch to Timing edits: backward.
- At the intersecting point, enter
6.0using its canvas time label or the Time [s] table field. Earlier cyclist points are recalculated while its later exit time stays fixed. - Compare the two labels: the car arrives at
4.0 s, the cyclist at6.0 s.
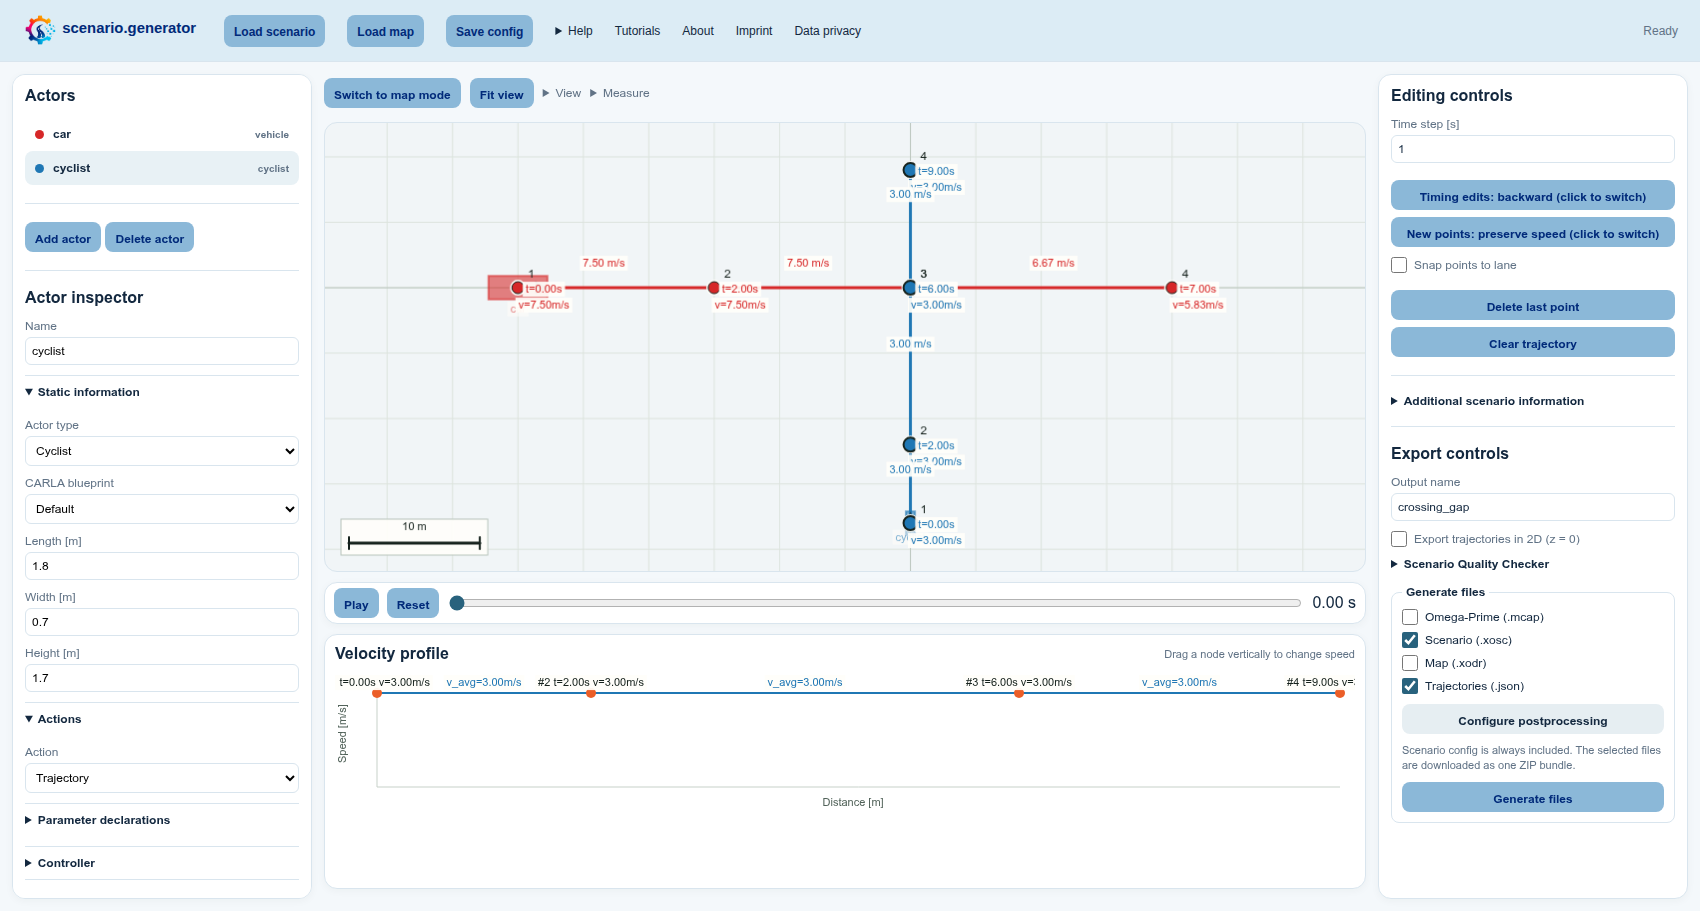
Why the two switches feel different: New points: fixed time step / preserve speed affects only newly selected points. Timing edits: forward / backward affects edits to existing point times, speeds, and positions.
3. Check the result
- Select Play in the playback bar below the canvas and watch the intersecting scenario once.
- Open Measure → Distance above the canvas and select two points if you want to check their spatial separation.
- Open View above the canvas and enable TTC min and THW min for an additional conflict check.
- If a label is crowded, drag its point slightly on the canvas or use the Trajectory points table below the canvas for exact values.
4. Export and post-process
-
In Export controls on the right, enter any useful Output name, for example
intersecting_gap. This only determines the downloaded filenames. -
In Generate files directly below it, choose the formats that match your next step:
- Scenario (.xosc) creates an ASAM OpenSCENARIO XML file for a simulator or other OpenSCENARIO-compatible tooling.
- Trajectories (.json) is useful when you want the selected points and actor data in an easy-to-inspect format for analysis or custom scripts.
- Omega-Prime (.mcap) is a useful exchange format for road-traffic data. Omega-Prime files are compatible with many tools available through the SYNERGIES Marketplace.
- Map (.xodr) creates an ASAM OpenDRIVE road network. It is unnecessary here because this example deliberately has no map.
Select both Scenario (.xosc) and Trajectories (.json) if you want to try the simulation and data-processing workflows together.
-
If you selected XOSC, choose Configure postprocessing in the same panel, select
set_stop_simulation_time, and set Stop simulation time to12seconds. -
Select Generate files at the bottom of the right panel. The configured postprocessor runs during export. The ZIP always contains the editable scenario configuration and additionally contains every selected format.
You now have a compact regression scenario whose expected result is easy to state: the cyclist enters the conflict point two seconds after the car.